👋 Getting started as a Translator or Proofreader (Your first task)
This quick-start guide is for translators who’ve just been invited to work on their first document in Redokun.
Here’s how to get started, what to expect, and how to use the Web Editor effectively.
Hey 👋
Welcome to Redokun! You’ve just been invited to collaborate on your first project.
Here’s a quick guide to help you work faster, stay consistent, and make the most of your tools.
🌟 Why Use Redokun?
Redokun helps you translate efficiently and collaborate without the usual chaos.
- ✅ Reuse approved translations using Translation Memory
- 🤖 Speed up your work with AI translation suggestions
- 📚 Stay consistent with Glossary terms and smart matches
- 💬 Work together with comments and real-time updates
- 📁 Skip messy files—just translate in your browser
- 📨 Stay in the loop with automatic email notifications
- 🎯 Focus your time with clear task assignments and progress tracking
📩 Step 1: Accept the Invitation
-
Check your inbox for the invitation email from Redokun. Look for a button labeled Activate Account.

- Click Activate Account and create your password.
- After logging in, you’ll see your Document List. Find your assigned document there.
- Click Accept Invitation to access your translation task.


❓ What happens when you accept?
- You gain access to the Translation Memory and Glossary (if available) for your language pair.
- The manager is notified that you’ve joined the project.
🧠 Step 2: Access the Document
-
On the Document List page, you can use search, folders, or the In Progress status filter to find your assigned document.

- Click See Details to open the document page.
- From here, you can:
- Translate online using the Web Editor.
- Or, download an exchange file to work offline.

🔀 Prefer to Work Offline?
If you’d rather use your own tools, follow this guide: Translate a Document with an Exchange File
If you’d rather use a spreadsheet, follow this guide: Translate a Document with a Spreadsheet
🧬 Step 3: Open the Editor and Understand Segment Types
Click on Editor to open the document in Redokun’s Web Editor.
You’ll see a progress bar showing how much of the document is translated. Each color represents a different segment status:
- Empty segments – no translation yet. Start from scratch.
- Draft segments (yellow) – auto-filled by AI or TM, or marked as draft. Review and confirm.
- Confirmed segments (green) – already approved. These are saved in the Translation Memory.

📖 Want a full overview? Check out the Web Editor guide →
✍️ Step 4: Translate the Content
You can translate segments manually or use Pre-Translate.
Option 1: Translate manually

- Click a segment.
- Type your translation or refine a suggestion from AI or Translation Memory.
- Keep formatting tags (e.g.,
[1],[2]) in place. Learn more about tags →
Option 2: Use Pre-Translate

- Click Pre-Translate in the top-right menu.
- Choose your settings and click Launch Pre-translate.
- Review and confirm the suggested translations.
Learn more about Pre-Translate →
✨ Step 5: Use AI Fine-Tuning to Refine Your Translations
The AI Fine-Tuning helps you:
- Improve quality quickly – Correct grammar and spelling in seconds.
- Find the right tone – Explore different alternatives to match your style.
- Fix layout issues – Shorten text to avoid design problems in languages like German.
To use it:
-
Click the ✨ Fine-tune button next to any segment.
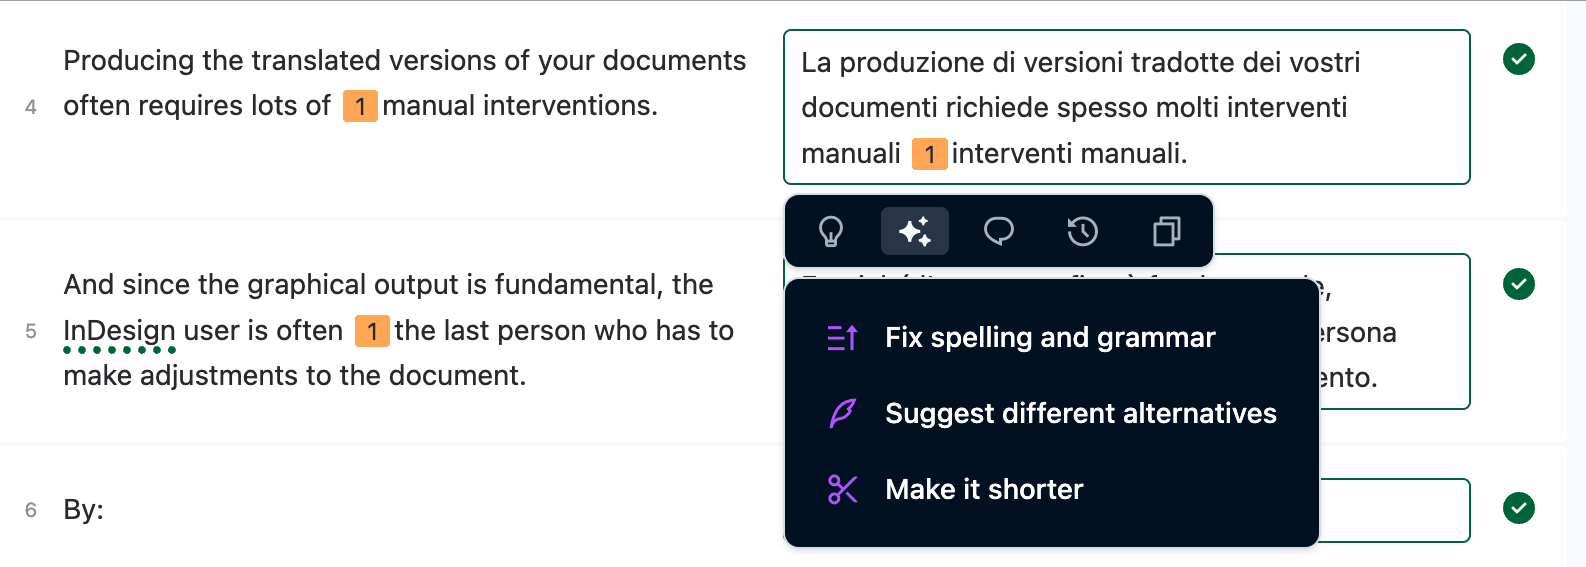
Choose one of the refinement options:
- Fix spelling and grammar – Corrects grammatical issues and typos while ensuring proper sentence structure.
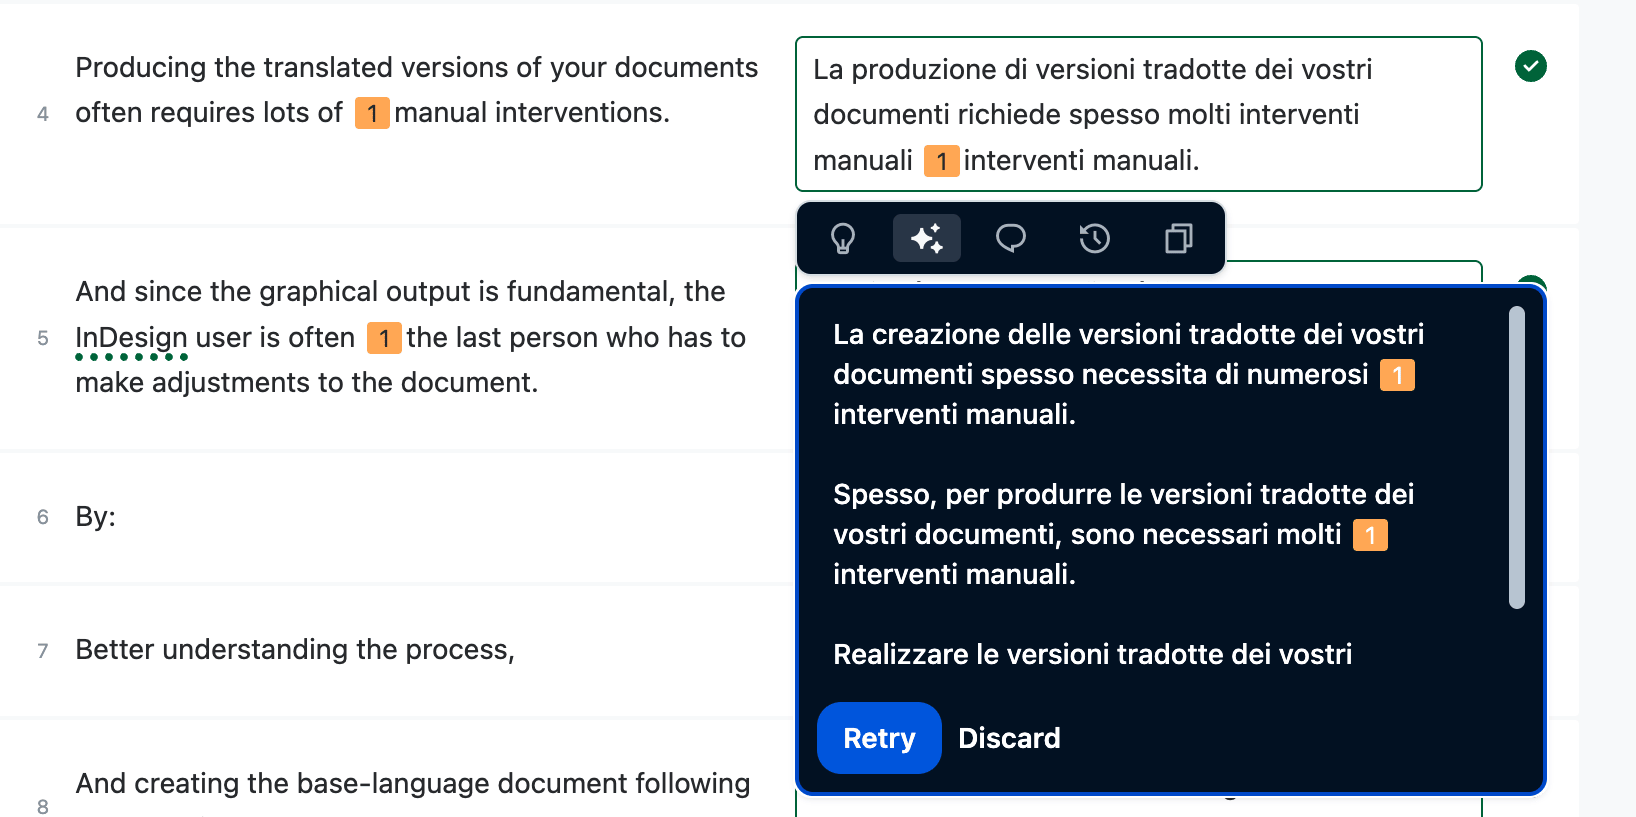
- Suggest different alternatives – Offers alternative phrasings so you can choose the best fit.
- Make it shorter – Condenses the translation while preserving key information.
-
Review the AI’s suggestion. Use it as is, or retry for a different suggestion until you find the best fit. The result will be copied into the translation box, where you can edit it further if necessary.
For more information, see the full guide: AI Fine-Tuning.


🔍 Step 6: Review and Confirm
- Review each segment for accuracy and clarity.
-
When you’re happy, make sure the segment is confirmed. Confirmed segments are saved to the Translation Memory and reused in future projects.


✅ Redokun saves your progress automatically—no need to click Save!
✅ When You’ve Finished
Once all segments are confirmed:
- Leave a note in the Brief, notes and instructions section if a teammate should review the document.
- Or, click Confirm Translation to finalize your work. Redokun will lock the document and notify the manager.

⚠️ Only Managers can edit a document after it’s confirmed.
🎉 You’re done—congrats on completing your first translation task in Redokun!
📚 Best Practice: Use a Glossary
Glossaries help you translate faster, more consistently, and with fewer mistakes:
- ✅ Consistency: Always translate key terms the same way.
- ⏱️ Speed: Avoid wasting time on repeated terminology.
- 🤖 Smarter AI: Glossary terms improve machine suggestions.
⚡ It’s easy to set up: Just fill in this two-column Excel file (source + target terms) with the terms you use most often, and ask your manager to upload it into Redokun.
Even a small glossary can make a big difference—if your team doesn’t have one yet, now’s the perfect time to ask for it.
💬 Collaborate with Comments and Mentions
Use comments to ask questions or clarify segments. You can @mention your teammates to notify them instantly.
How to use comments and mentions →
