📘 Translate an XLIFF document online
This guide walks you through translating an XLIFF document directly within Redokun's Web Editor.
📄 What is an XLIFF File
In translation and localization, XLIFF files are bilingual documents that pair source segments with their corresponding translations. Each unit in the file contains the original text and a placeholder for the translation.
XLIFF is commonly used in e-learning platforms like Articulate 360 and Rise 360, as well as other content authoring tools that support export for translation.
Here’s a simplified example of an XLIFF segment:
<?xml version="1.0" encoding="UTF-8"?>
<xliff version="1.2">
    <file source-language="en" target-language="fr" datatype="x-test" original="file.ext">
        <body>
            <trans-unit id="str-02">
                <source>String 2</source>
                <target/>
            </trans-unit>
            <trans-unit id="str-03">
                <source>String 3</source>
                <target/>
            </trans-unit>
            <trans-unit id="str-04">
                <source>String 4</source>
                <target/>
            </trans-unit>
        </body>
    </file>
</xliff>
The <source> tag contains the original text, and the <target> tag is where the translation is placed.
📄 Supported XLIFF Files
Redokun currently supports:
- XLIFF 1.2 files only
- Files must be UTF-8 encoded
- Only documents that are not pre-segmented are supported. The
<seg-source>nodes are ignored when uploading a file.
Redokun does not support XLIFF 2.0 files and will not import existing translations from the <target> nodes.
📁 1. Upload Your XLIFF File
- Navigate to the Document List.
- Click on Upload Document.
-
Select your file and continue to the next step.
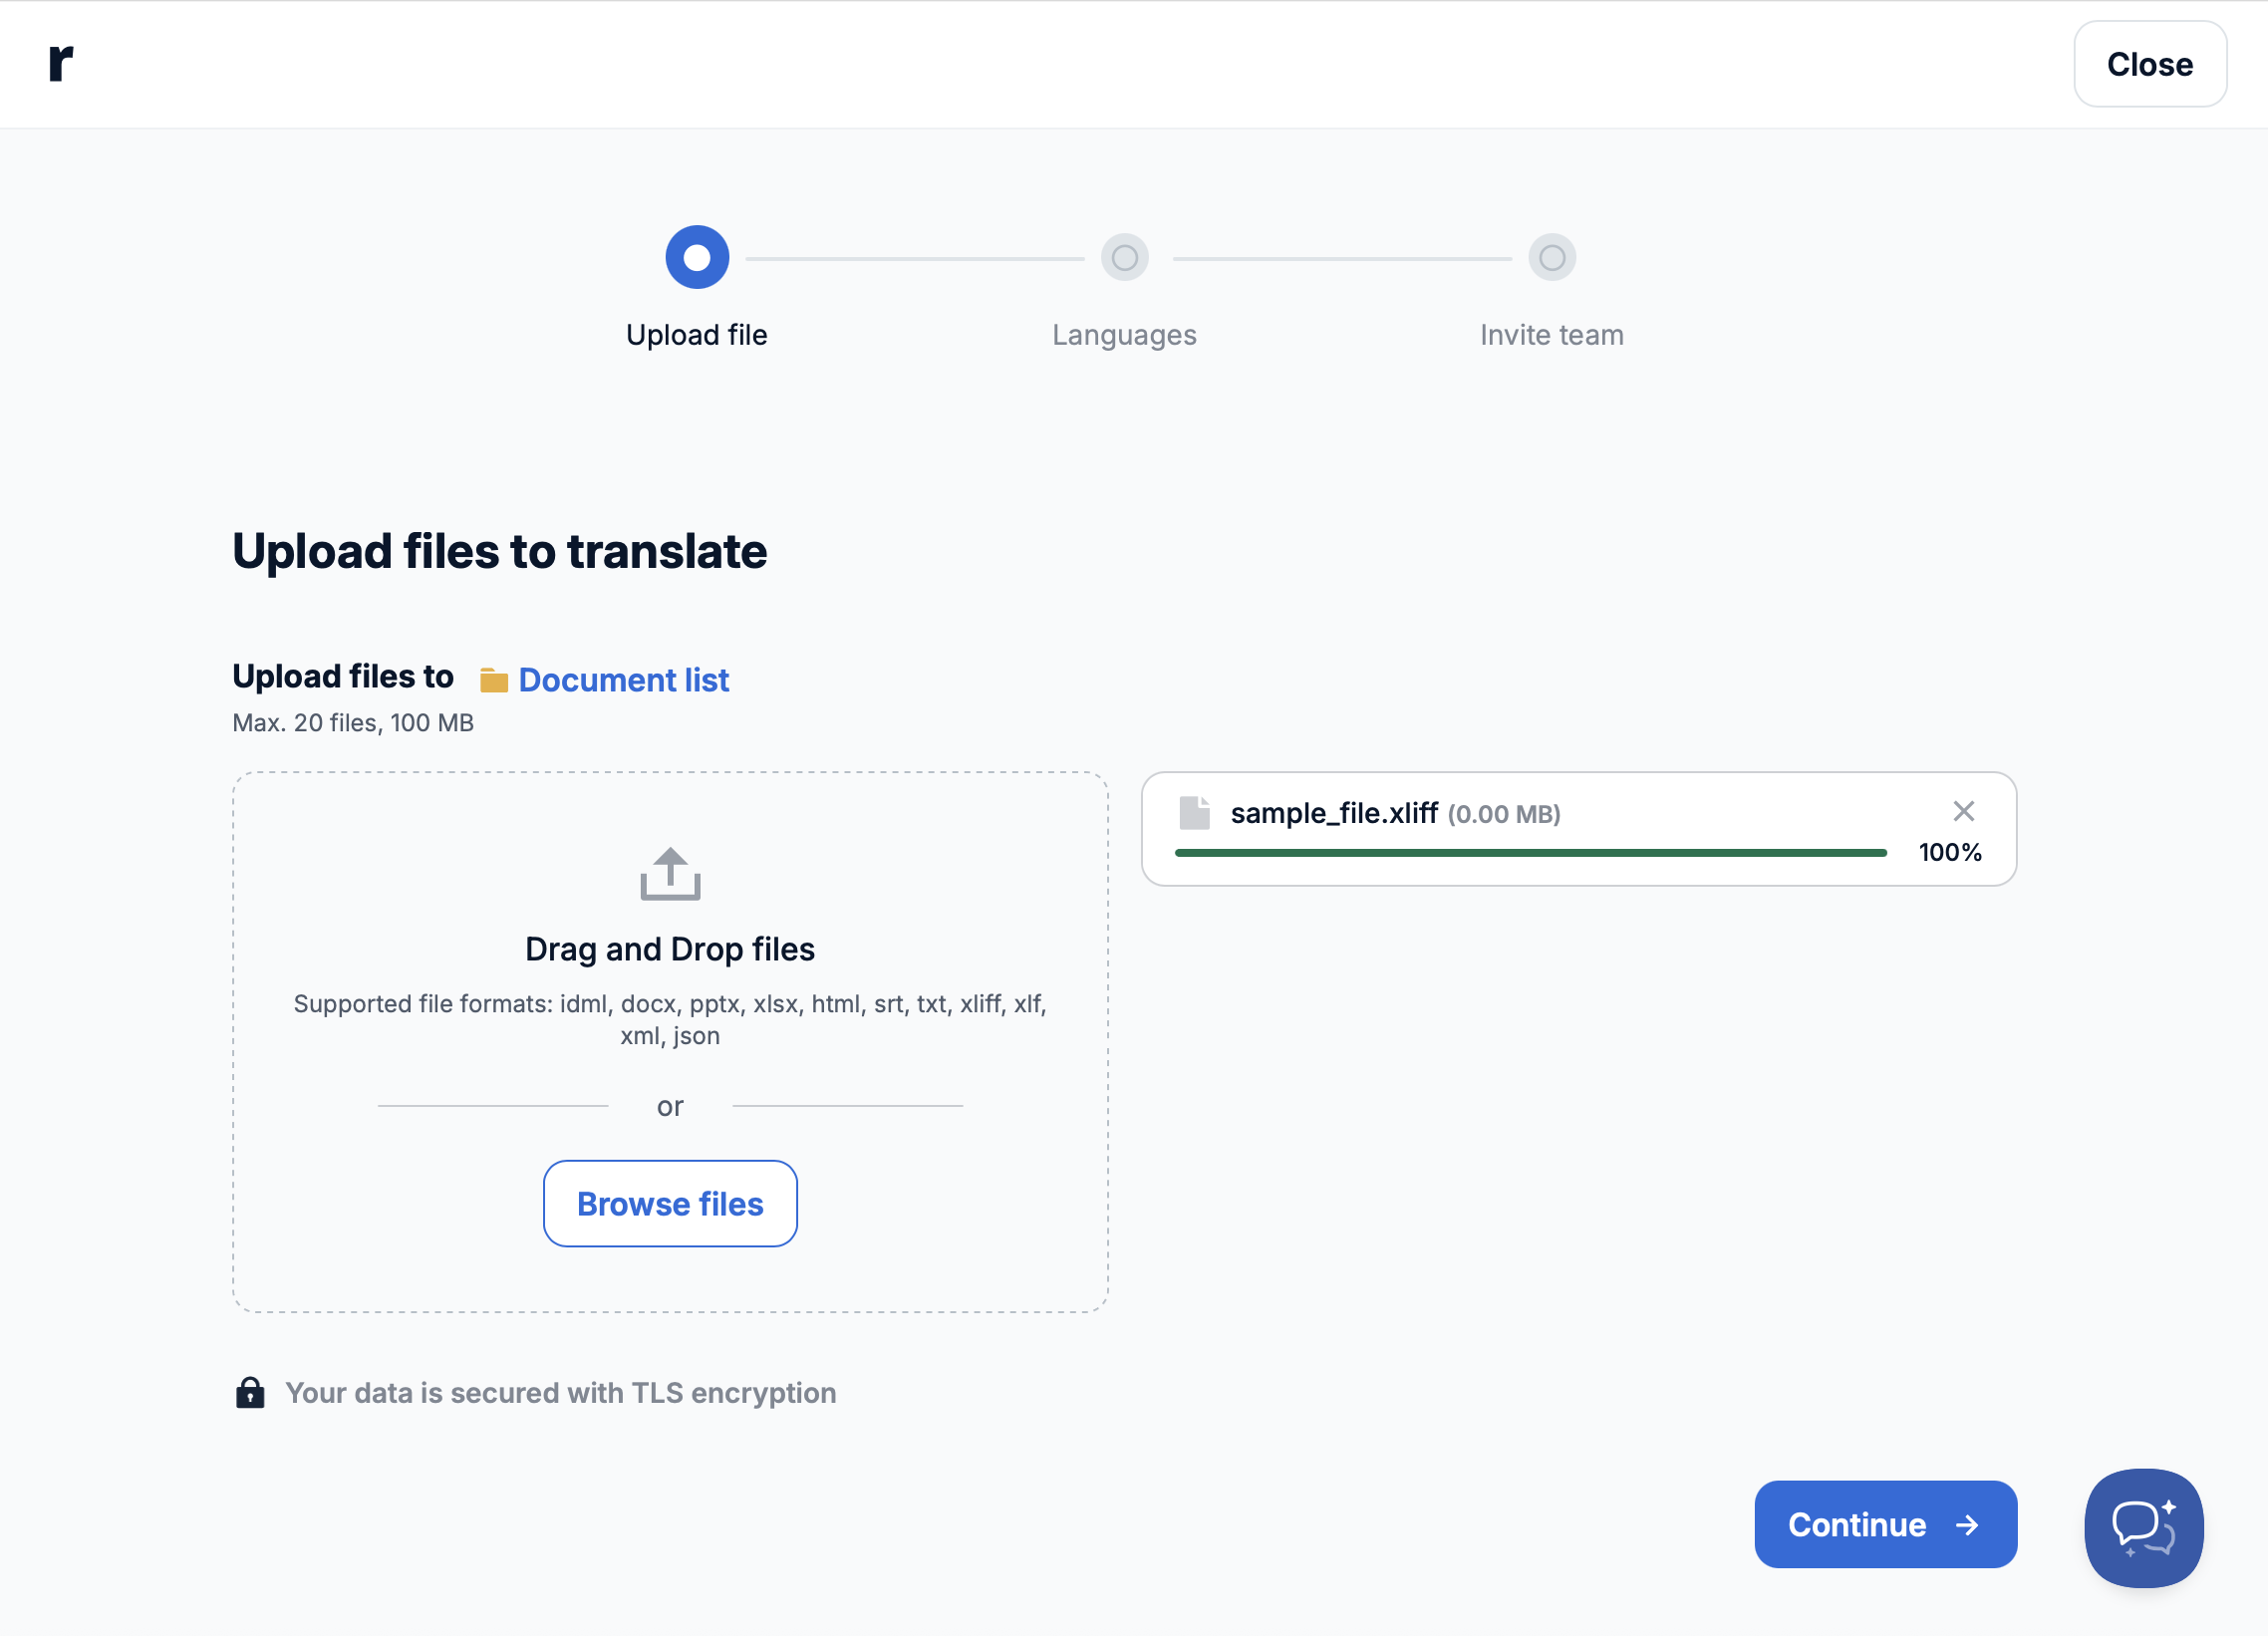
🧠 If your file contains HTML (for example bold text, links, or formatting), Redokun detects it automatically and keeps the formatting. There’s no setting to check.
Redokun supports various formats, including DOCX, IDML, XLIFF, PPTX, XLSX, HTML, TXT, JSON, PDF, and more. See the full list of supported file formats →
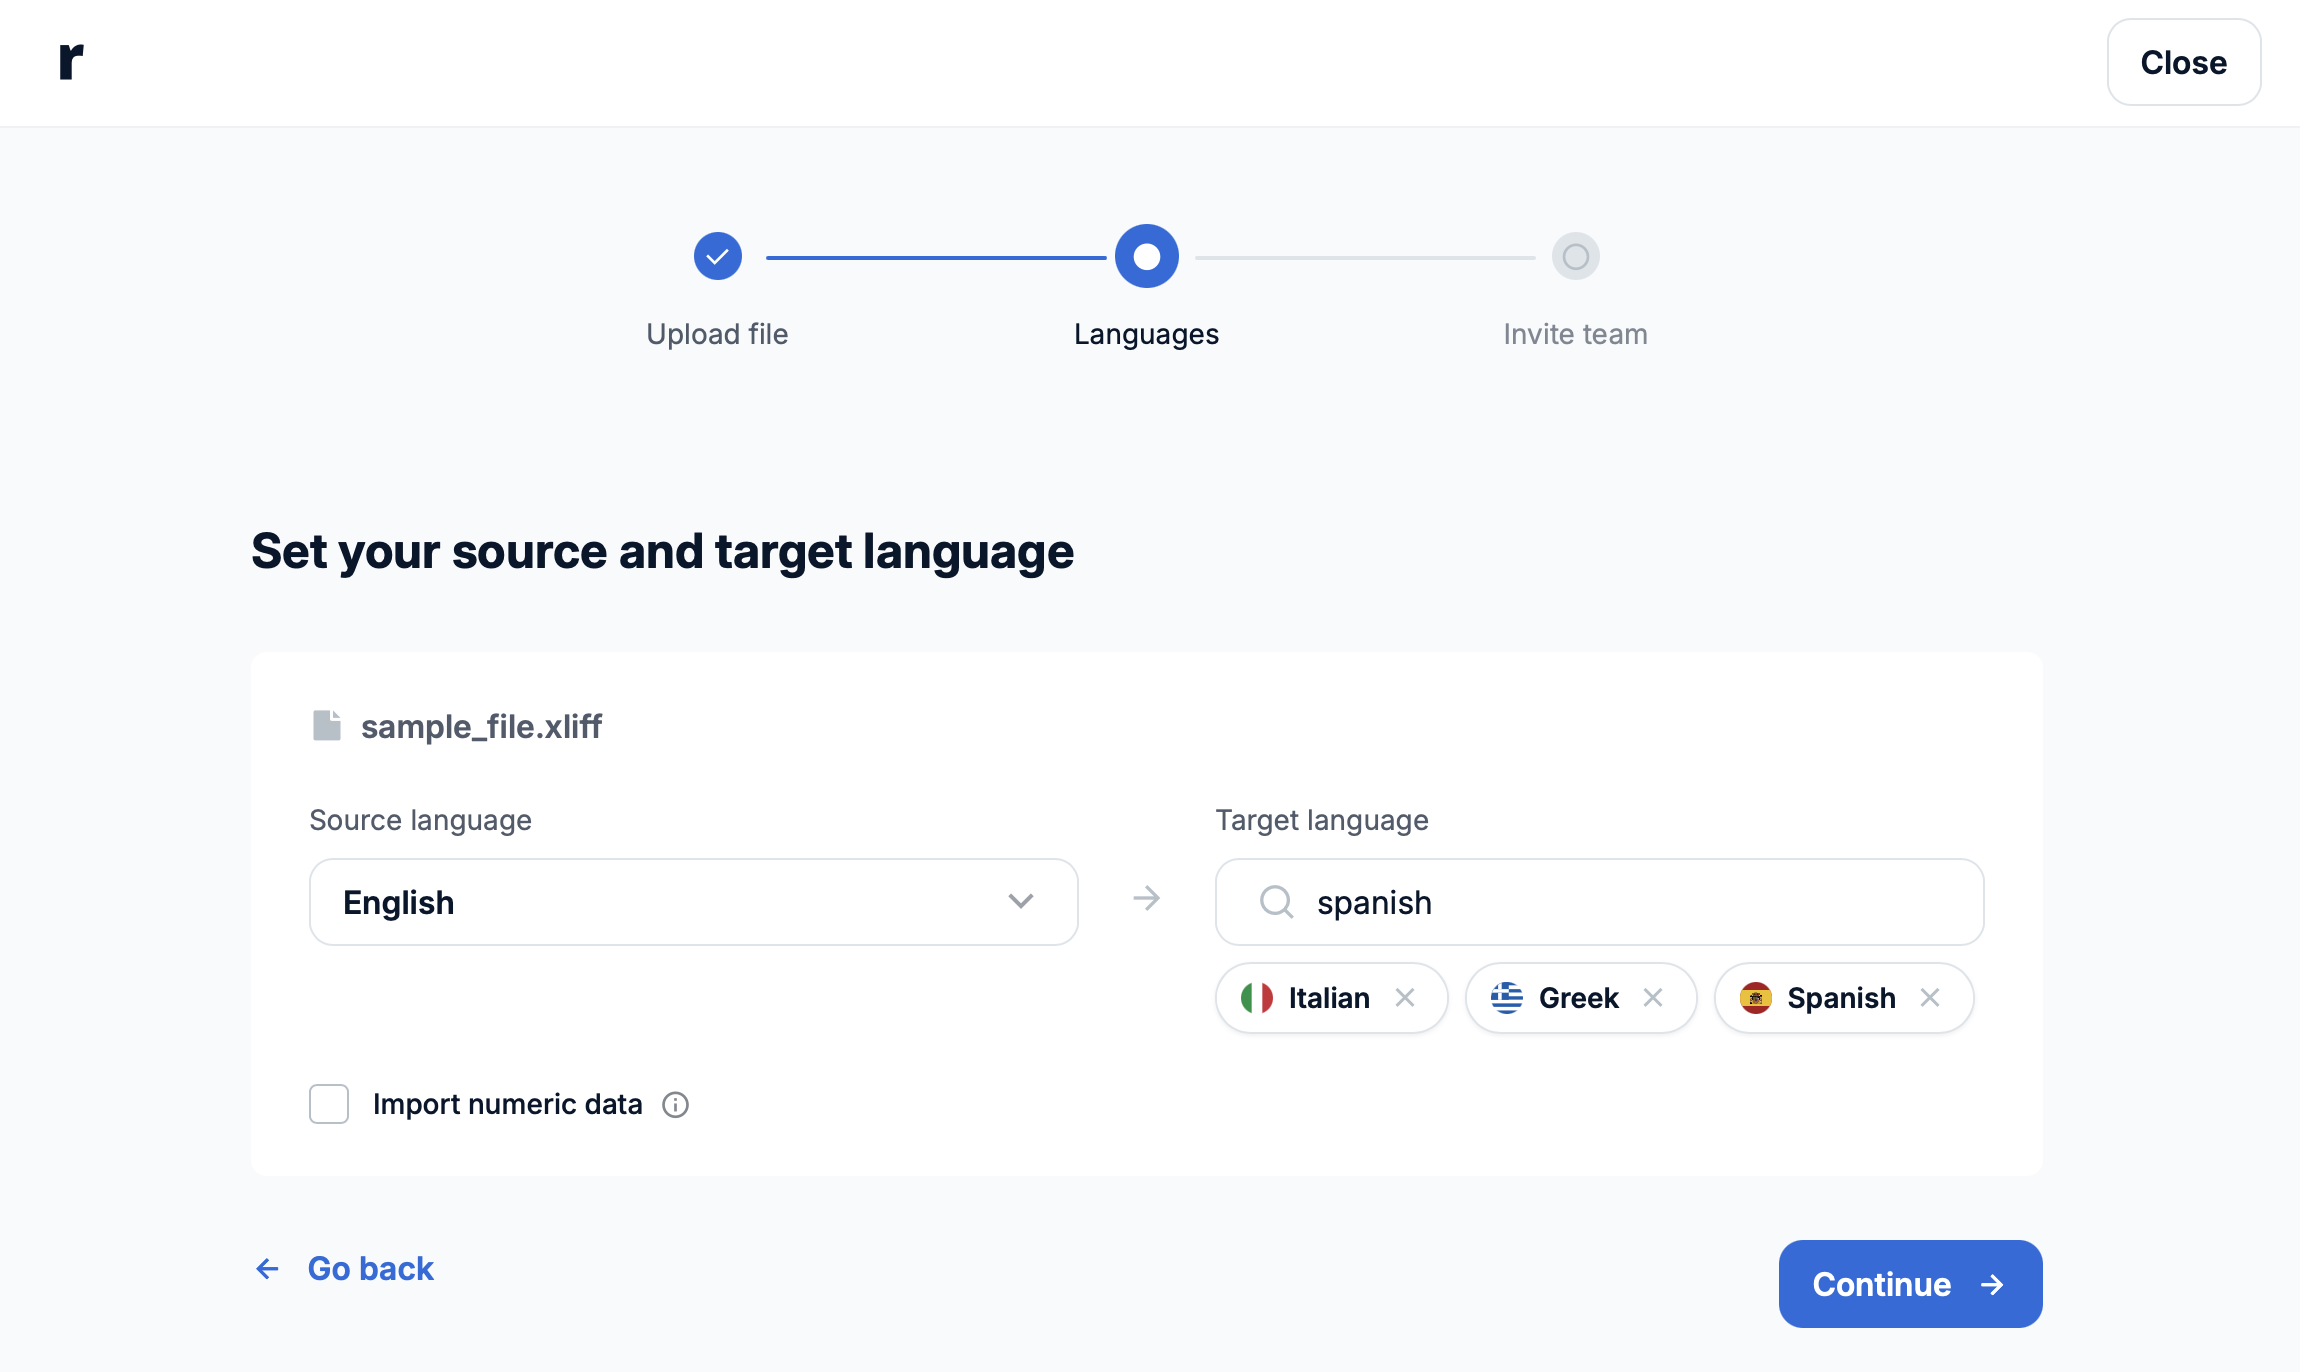
🌐 2. Choose Your Languages
On the Languages screen, choose the source language of your document and one or more target languages.
- Use the search bar or scroll the list to find your desired language.
- Click a language to select it.
-
You can add multiple languages in one step.
Country-specific languages:
Redokun supports multiple regional variants for many languages (e.g., German, German (Austria), German (Belgium)). You can choose the general version or specify a locale when needed. If you don’t see the language or variant you need, go to your Language Settings and make sure it’s enabled. If a variant is missing from the list, feel free to message us at support@redokun.com.
👥 3. Invite Your Team
On the Invite team screen, add translators and reviewers for each target language.
- Select someone you've worked with before, or enter a new email address to invite them.
- They'll receive an invitation to join Redokun.
- You can invite your team now, or skip this step and do it later.

➡️ What Happens Next
After you finish the upload steps, Redokun will:
- Redirect you to the Document Detail page (if you uploaded a single document), or
- Redirect you to the Document List (if you uploaded multiple documents).
From there, you can manage the next steps in your translation workflow. Typically, users take one of the following paths:
⚙️ 4. Pre-Translate the Document (Recommended)
To speed up the process, you can run Translate to:
- Automatically fill in previously translated segments using your Translation Memory.
- Use AI Translation to translate new segments (depending on your plan).
Where to do it:
- Click the Translate button for all languages from the Document Detail page.
- Or, run it on a language-by-language basis from inside the Web Editor by clicking on the Translate button.
Learn how to use Pre-Translate →
✍️ 5. Translate Online Using the Web Editor
If you or your invited collaborators prefer translating directly online:
- Open the document in the Web Editor.
- Translate each segment manually, or refine suggestions from Translation Memory and AI Translation.
- Use formatting tags as needed. Learn more about tags here.
- Confirm each translation once it’s completed. Confirmed translations are saved to your Translation Memory and can be reused in future projects.
Learn more about the Web Editor →
📅 6. Download the Translated Document
To download the final file, all translations must first be confirmed and locked. This ensures the content is stable and no further edits are in progress.
Confirm the translation
You can confirm the translations in two ways:
- From the Web Editor, by clicking Confirm translation after reviewing all segments.
- From the Document Detail page, by clicking Confirm and lock next to each language.
Download the translated document
Once a translation is confirmed and locked, the Download button becomes active.
Click Download to generate the translated XLIFF file.
Downloading a file may deduct words from your plan's word balance, depending on your subscription.