🔄 Convert XLIFF files to TMX
This guide shows you how to convert XLIFF files to TMX using Okapi Rainbow, a free localization tool. TMX files can be imported into Redokun to build or enhance your Translation Memories.
🧰 What You’ll Need
Before you begin:
- Okapi Rainbow — part of the Okapi Framework.
- Java Runtime Environment (JRE) — required to run Rainbow.
You can install the latest JRE from Oracle's website.
💻 Convert XLIFF to TMX
- Download Rainbow from the Okapi Framework download page.
-
Extract the ZIP file and locate the Rainbow application inside the folder.

- Launch Rainbow. You might be asked to allow it to run depending on your OS settings.
-
In Rainbow, go to the Input List tab and click Add Files to select your XLIFF files.

- Go to Utilities > Conversion Utilities > File Format Conversion.
- In the configuration panel:
- Enable Do not output entries without text.
-
Enable Output paths are the input paths plus the new format extension.
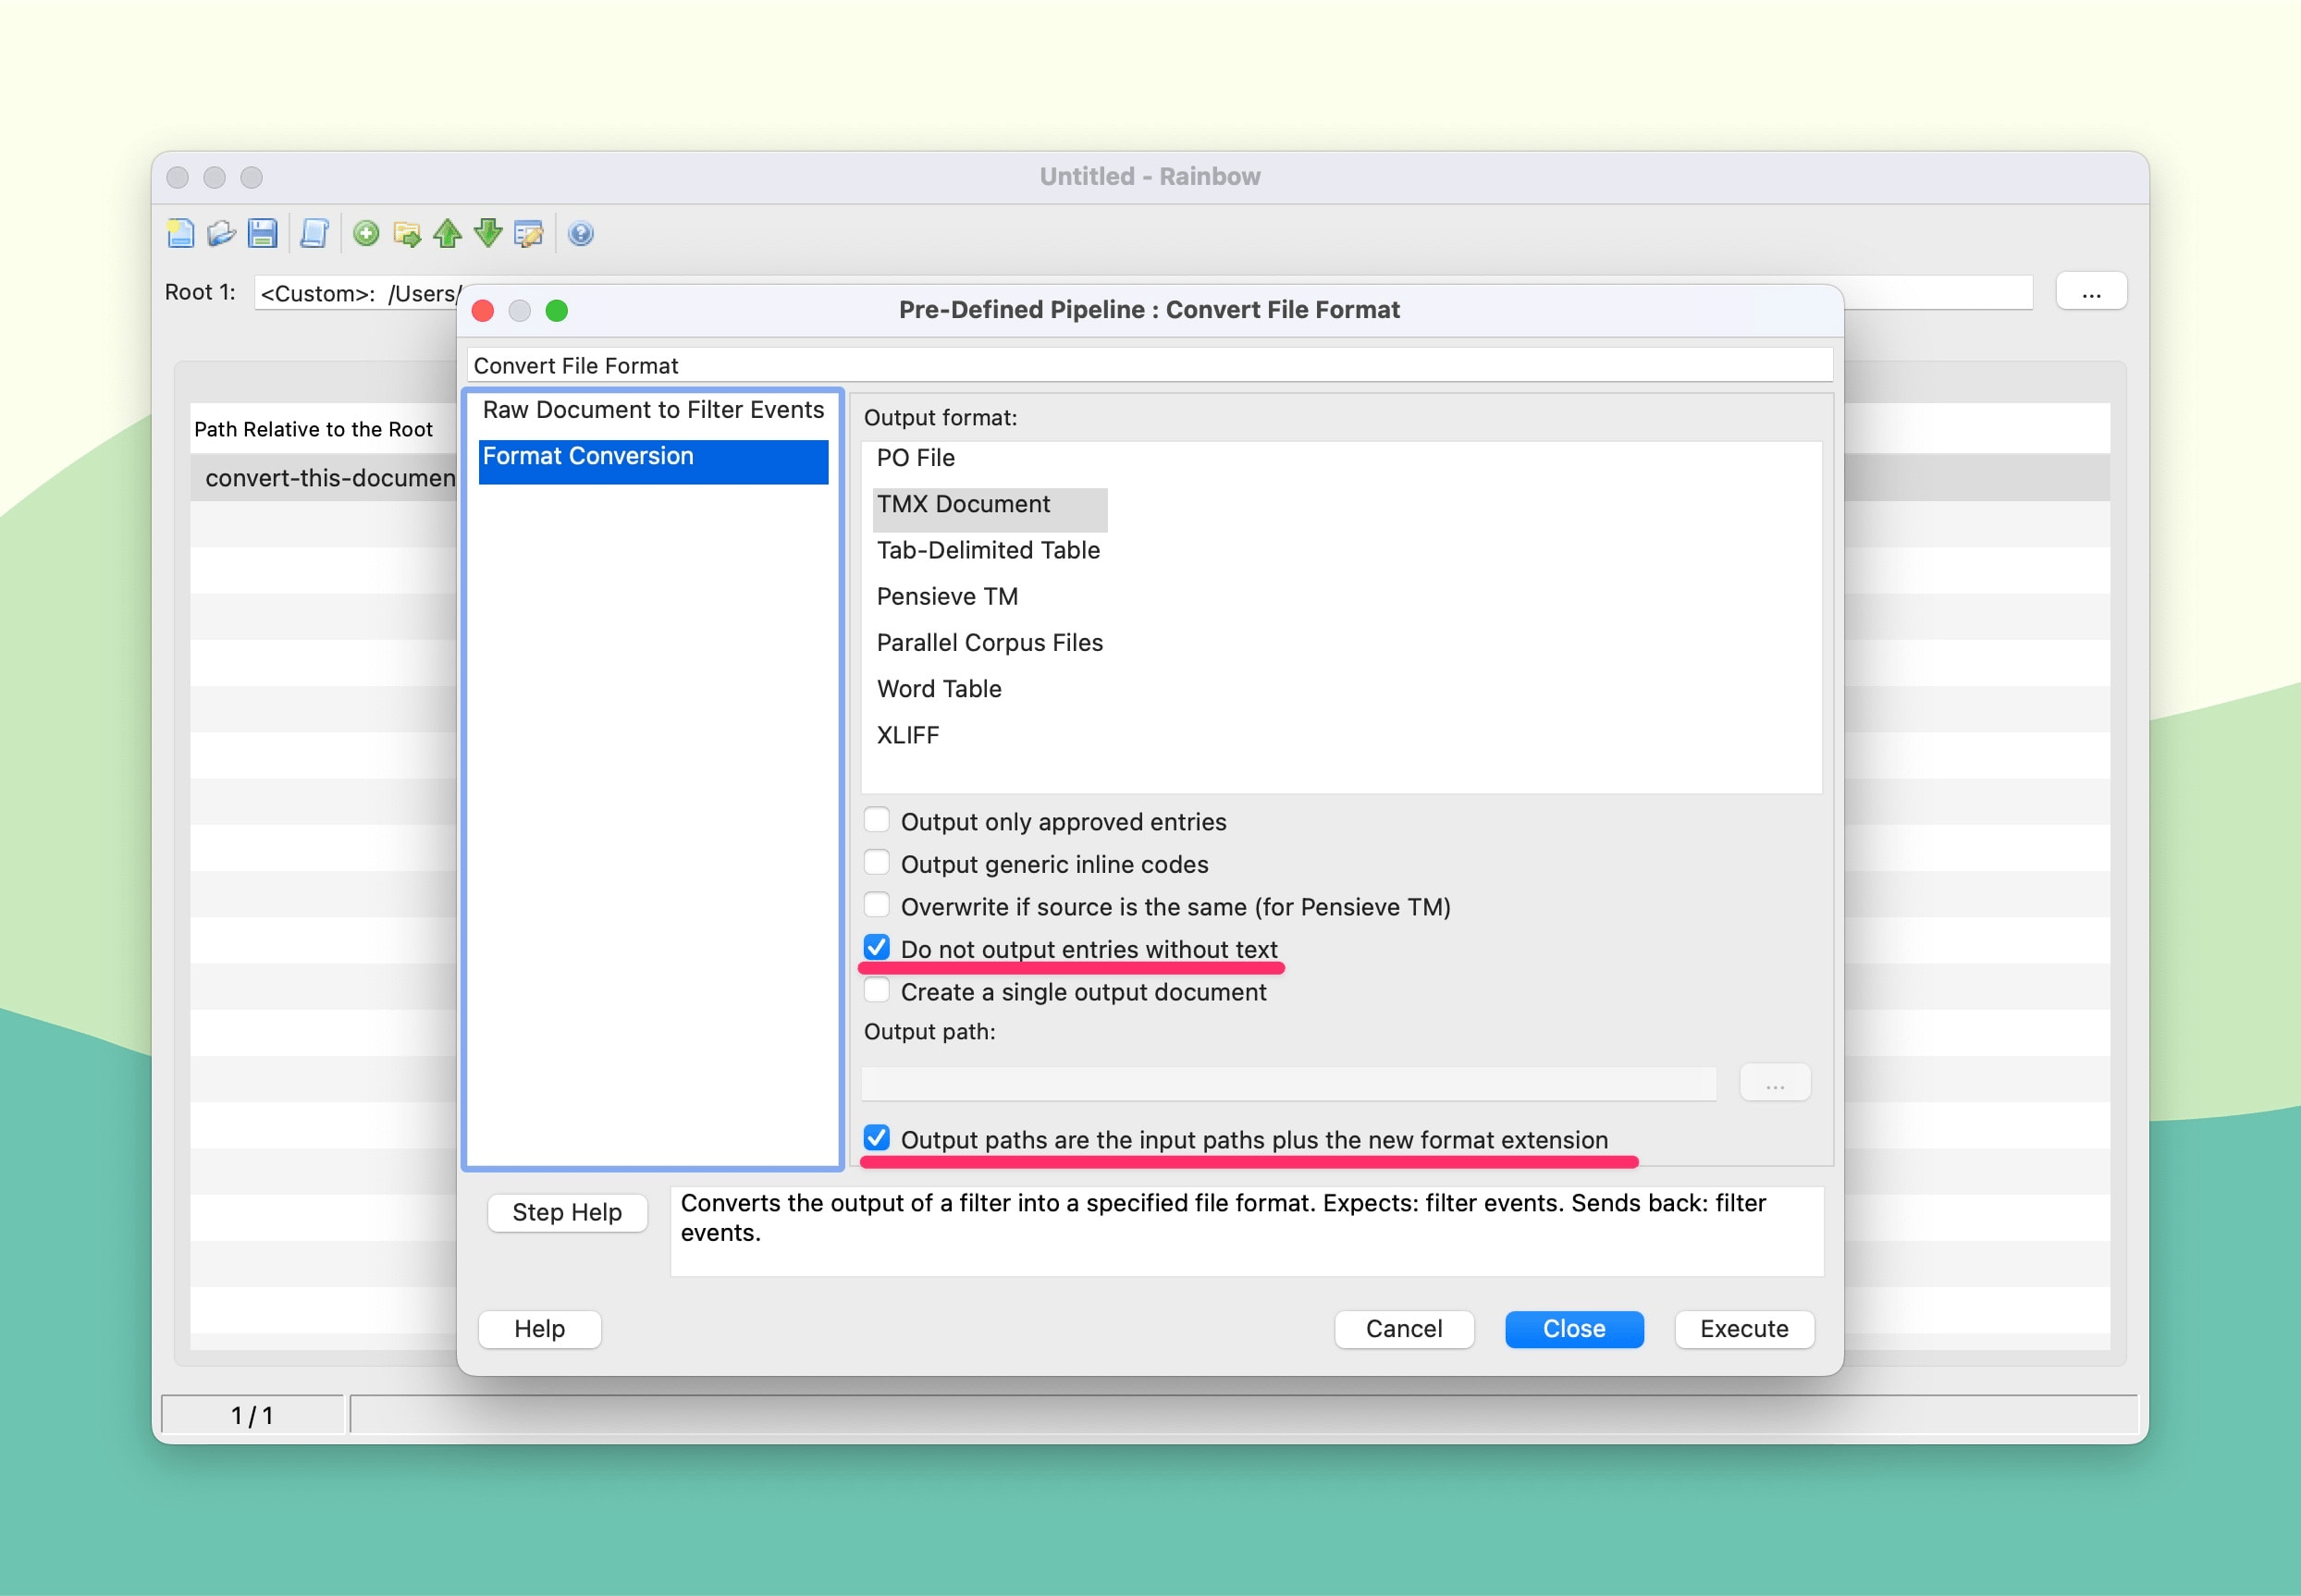
- Click Execute to generate TMX files. They’ll be saved in the same folder as your XLIFF files.


📅 Import the TMX File into Redokun
Once your TMX file is ready, you can upload it to Redokun and convert it into a Translation Memory.
👉 Follow the full step-by-step guide here: How to Import a Translation Memory into Redokun →
Need help? Contact us anytime at support@redokun.com. We’d love your feedback!